MID EIGHTEENTH CENTURY WINDOW RESTORATION MYSTIC CT
The owner of a magnificent 18th century farm near the Mystic River in Connecticut had some broken panes in one of his workshop windows, and I gave him the option of simply replacing the panes with some antique glass (I have a lot of this) or doing a full restoration of both sashes. They were glazed with a mix of putty and caulk, had about fourteen pounds of roughly applied paint on them, and hadn't operated in years.
He chose full restoration. This is how that's done.
A bit rough from the inside as well.
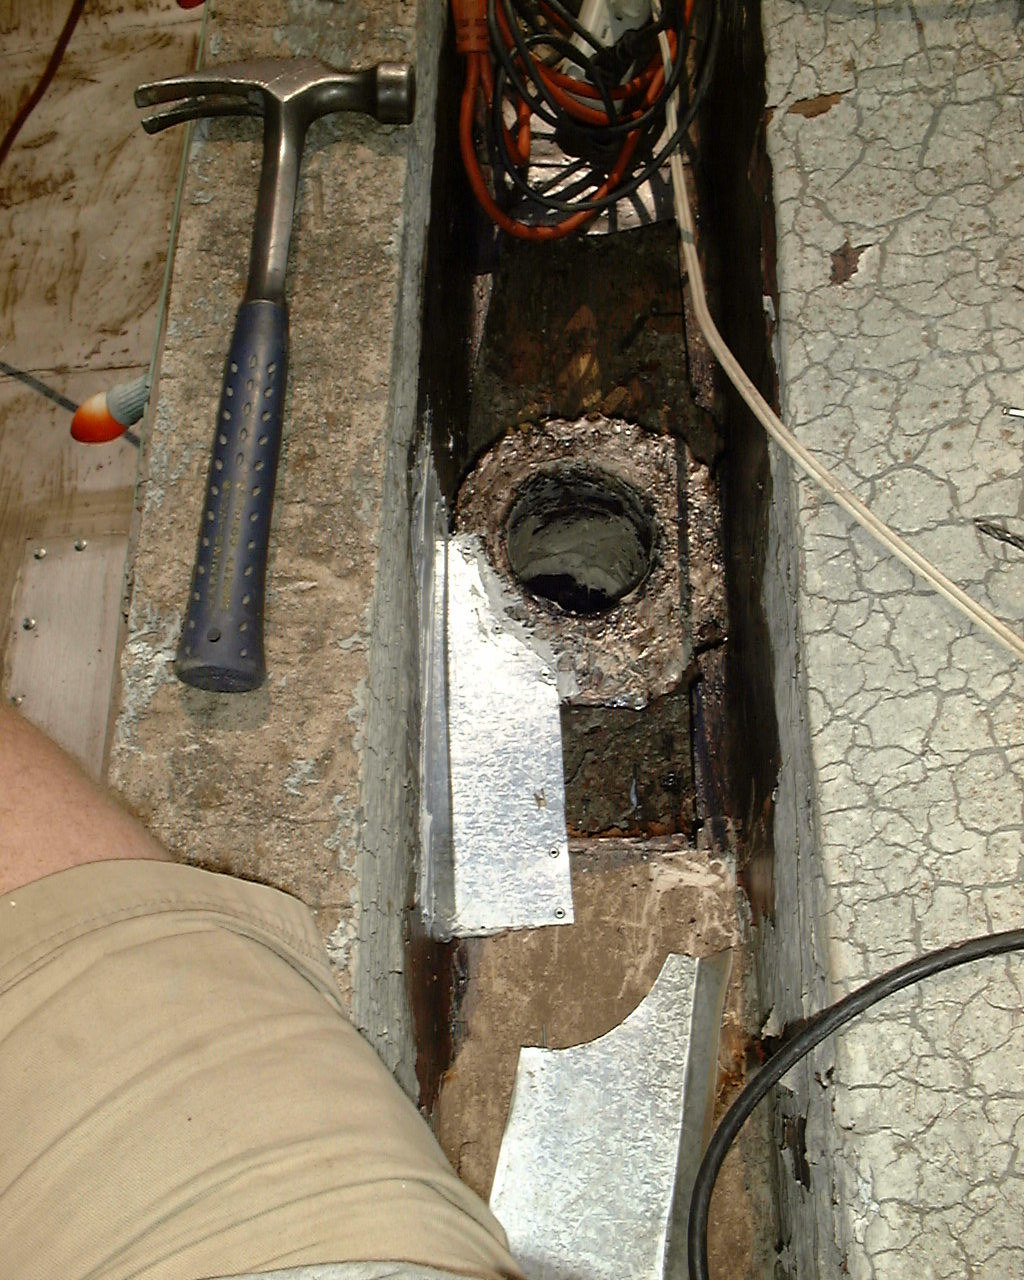
The first task is to remove the sash. Almost all upper sashes in a double-hung overhead system like this have been painted shut for years. Back in the goodle days, the upper sash often operated to allow warmer air to escape in the warmer months. This set of sashes, being Colonial, are different from more modern (19th and 20th century) sashes. The upper was non-operational from the beginning. This being a small shed/workshop, the upper air circulation was deemed unnecessary. Plus it's Connecticut, where the cold is more of a factor in how windows operate.
Needles to say, I used my trusty multitool to cut the sashes from the casement, then put plywood panels in to keep out the rain, birds and wayward hobos looking for an overnight. Actually there are none of those at this farm.

Once on the operating table in the Stripping Shop, I gently scraped the sash to reveal the structural repairs I'd need to do. If the corners have begun to separate, I screw thin plywood gussets to them to reinforce them while doing paint removal. This saves the wood as well as the glass, and some of the glass in these windows was Crown, a hand-blown early Colonial glass that is nearly irreplaceable. It has much more distortion that later antique glass, with more bubbles, streaks, and often a potato-chip shape that makes it impossible to cut without breaking. I handle it with utmost care; removing any metal points can be problematic and is performed as surgery. This window had small square nails holding in the glass, and it took some care to get the rusty buggers out. But I didn't crack any panes.

The exterior showed a lot of the putty had fallen out and had been replaced by caulk, a common practice that works, but looks horrible, making the thin muntins (crossbars) look clunky and uneven. But it did save these windows from disintegration.
After steaming
The sash are examined in the stripping shop, and loose glass is removed so it won't break during the handling of the windows. The glass panes are numbered with a Sharpie from one to whatever in a clockwise pattern from top to bottom. Sharpie ink, once allowed to dry, is quite resilient through the steaming process. It is easily removed by rubbing with mineral spirits soaked cloth once set back in place.
Why number these panes? Aren't they all the same?
Slight differences in the original cutting of the glass and warping of the wood over years makes it necessary to mount the glass EXACTLY as it was removed from the same positions.
It takes several steamings in a big wood box specifically made for such a purpose to get the putty soft and to remove the glass. Then the flat surfaces of the rails and stiles (they are the frame of the sash) can be scraped of lead paint. I use Swedish steel scrapers, one of which can be seen in the picture. They are sharp enough to remove the softened paint without gouging the wood.
But even using my fingers to remove the old paint from the muntins, the ancient white pine gets fibrous and begins to lose its profile, made in a water powered mill three centuries before.
Strips of acrylic caulk removed from the upper sash.
This is no way to glaze a window pane...
S'not easy to remove, even with steaming the sash. Sticks like glue. I have to be careful using steel tools around the thin putty rails, lest I damage them. It's like surgery in a wrestling match. The window cools as it is pulled from the steamer and you have to be vewwy vewwy careful as you remove the putty. Single edge razor blades are my friends.
Note the small nail in the upper pane. Not exactly the way we pro-fesh-un-ulls would do it.
After removing the panes and scraping the flat parts of the sash, I hang them to dry.
There is only so much I can do to scrape a window while it is wet, right out of the steamer. Wet scraping must be done with kid gloves, even though it needs to be done quickly, while the sash is warm and the putty and paint are soft. Care must be taken, and I'm constantly observing whether the wood fibers start to pull away as I scrape. Despite the extremely sharp Swedish steel of my scraper, the direction of the wood grain is the guide to which direction you must scrape. Otherwise you turn the wood into fuzz.
Once dry, the paint has crystallized and can be carefully scraped and sanded. Yes, I use HEPA vacuums and wear a respirator and protective clothing.
After the sash dries, I dry scrape the entire thing. The scrapers must be extremely sharp to remove crystallized paint and not gouge the wood of the stiles (sides) and rails (top and bottom). I use softer steel and even extremely hard wood tools to remove the paint on the muntins, and you'll see why in the next pic.
The ancient white pine of this nearly 300 year old sash is quite friable, and so fuzzed up heavily, therefore I did only as much removal as necessary. It would take some careful sanding to restore the muntins and remove the fuzz.
If you look carefully, you can see that the tiny square bead on the top of the muntin has been previously sanded, leaving the center of the bead almost invisible and the ends that are in contact with the rail and next muntin nearly as intact as it was when milled.
This will be seen throughout this particular project, as the age and soft wood combine with the many times this window sash has been repainted.
It takes a light hand to deal with muntins. They are fragile. and white pine is very, very soft.
AAAAUUUUGHHHH!!!!
FUZZ BEGONE!
The trick is to use finer and finer grits of sand paper. I usually begin with 80 grit, step up to 120, then finish it out with 150, The higher the number, the finer the sandpaper and the smoother the surface becomes.
But this window started with 120 and ended at 220, then was rubbed down with green Scotchbrite. The former removes most of the fuzz, the latter smooths the surfaces and corners without dulling the profiles.
This is my favorite feature of this job.
Yankee craftsmen, especially backinnagoodledays, never threw anything away, and I am (as many of my friends and colleagues know), cut from the same cloth. I don't hoard; I reuse and save that which I know will come in handy in future jobs or tasks or whatnot.
The craftsman that built this sash is my hero.
Most other woodworkers would have thrown away the split of wood that was to make up the bottom rail of this sash. It had a very serious KNOT in it, and so would interfere with the sash's ability to not warp as well as causing a weak spot that would cause it to break in the future.
Not this craftsman, and not this flitch of wood.
Whoever it was, by chance or by intention (I suspect the latter), not only chose this piece intentionally but placed the knot EXACTLY WHERE IT WOULD DO THE MOST GOOD.
Most knots cause problems and are stuck fast in a piece of wood, but I suspect this one was loose, fell out, and left a nearly perfect opening that, when squared up, would accept the end of the muntin (a tenon) easily. And it would hold that muntin for a long, long, time.
Keep in mind that none of these windows' joints used glue; they relied on the craftsman's ability to JOIN them well, Peg them properly and let the GLASS do the structural work once puttied in. That's how windows work.
But to use a knot as a structural device???
Genius. Pure genius.
Or, as we say in Connetykit,
'Makes sense and saves a board."
Once a coat of oil based primer is applied to the slightly fuzzy wood, a miracle happens!
The wood is just as fuzzy as before.
But the wood FIBERS are now hardened with the absorption of the oil based paint. A few wipes with 220 grit sandpaper and a swipe or two of Scotchbrite, and the sashes, including rails, stiles, muntins, and milled profiles, are smooth as can be. Sometimes a second coat of primer is applied, but this is seldom necessary.
One note to readers.
It is before the primer is applied that I do the repairs, and these sashes needed a few new pieces of wood added where the old had become desiccated, rotted, or split out. That subject is for another post upon which I am working. Keep your eye out in the next week or two.
Smoothie McSmoothface.
Rails and stiles with pits from weathering are filled with a sandable mix we call MH, named after the company that makes it. Any good hardware store has it. It's a mix of powdered nepheline syenite (a type of feldspar) and benzene.
Work it quick, smooth it with a thin blade and don't breathe the fumes!
Then sand it smooth and prime it.
Caulks and fillers should always be applied AFTER the primer has been applied. Otherwise the raw wood, being thirsty, will absorb the vehicle (the oil or water, depending on the application) too quickly and the filler or caulk will shrink prematurely.
I'll bet you folks have seen this happen, too.
A slight touch-up with primer is a good idea where the caulk or filler has been applied
After they dry, of course.
This particular window was restored during a severe cold snap in southern Connecticut, and I planned for this by bringing in a lot of semi-dry wood for the wood stove. Paint doesn't set well below 40 degrees, and we had two nights at 7 below.
What you're seeing here is a bunch of wood splits drying on the wood stove itself.
Do not try this at home. I was there working in the shop to take the splits, turn them, and remove them so they didn't smolder while drying on the stove.
I only burned down the shop twice after doing this.
One of the advantages of having a wood stove is that my window sashes dry rather quickly when hung above it.
This is particularly useful during a 7 below cold snap.
Such as in this picture. Note that the propane heater, only used before the wood stove reaches Hotness, is dark.
Chunks of candlewood ready to split into...splits.
One of the advantages of being an antique woodworker (yes, I'm old, but here I refer to the wood, like duhr) is that my collection of sappy longleaf pine is available to cut into tiny splits that start fires in my wood stove by merely breathing on them after a good night's snort.
No, NO!
That was last night. By breath is no longer flammable this morning. I use a MAP gas cylinder and a hose with a lighter/torch to apply flame to the naturally turpentine-soaked wood. It nearly explodes before I load the tiny fire with more heart pine flitches and cutoff wood. The kindling and smallwood then follows, and by the time I'm ready to go to bed, I can put a number of large logs into the stove.
No, I jest. In an hour I can turn off the propane heater and let the stove do it's thing.
I often have to open the shop door, even on cold days. And my ceiling is 1/5 insulated. Wait til next year, they'll find me as a crispy critter in my shop!
What a way to go...
Non-sap impregnated heart pine that will take the candlewood to heights.
Each piece comes from old growth longleaf pine that was milled a hundred fifty years ago and was a seedling when the Spanish conquistadors roamed the south. These particular pieces are small and not worthy of milling into beautiful objects. I have plenty of THAT kind of antique pine and don't burn it, except as cutoffs.
Even after the primer, the Great Knot of Mystic River still shines.
How's about some professional controversy, Scarecrow?
At this point, the professional window restoration technician should backbed the already-cleaned original panes with the same putty to be used in glazing the window. This will fill the gaps between the glass and the wood of the window. The glass is pressed down into the putty and all is weatherproof, waterproof, and right with the world.
But this particular window contained original mid-1700s glass, some of it Crown glass. Crown is very thin, very convoluted, and very rare. It was hand-blown and spun. Named for the fact that it came in small panes from England in Colonial times, it was used as ballast on square-rigged ships that also brought Colonists and trade goods to the Colonies. This was the only glass available to the Colonists, and as good ol' King George (choose one) needed money for his constant wars against France or Spain (choose one), he taxed glass to the ceiling. If you think tea taxes and the Stamp Act led to revolution, you are dead wrong. It was the Glass Tax.
But I digress, and that usually smells bad. Most people leave the room.
The problem with early Colonial glass and Crown glass in particular, is that it is often curved, sometimes called 'potato chip' glass due to its opposite curves from end to end, resembling a potato chip.
Duh.
This makes the glass pane difficult to set. And Impossible to Cut.
I would normally backbed my glass in a thin line of Sarco Type "M", my favorite glazing putty, then use trimmed push points or diamond points from an antique Red Devil Point Gun to hold the glass to the wood. But the older the glass, the more likely it is to break when you use metal points to hold the pane in place.
The solution is to bed the thin, curved glass in an adhesive caulk, and I choose one that is a vinyl caulk that hardens. This way I can let it set, trim off the excess with a number of razor tools, and not worry about breaking antique glass.
Which is the Ultimate Sin in restoring antique windows.
I carefully apply this caulk only to the edge of the muntin so that it does not squeeze through to the side that gets the glazing putty. That way I can apply the putty even if the caulk does not dry after the first 24 hours, which is likely in the Connecticut winter. But 2 days later, I can trim it so close that no one knows it's there.
Don't tell.
It takes some very careful pressing down on the very thin glass pane to achieve the proper backbed, but it WORKS.
See? After pressing.
Note the distortion of the light reflection. Pane 3 is flat glass, pane 2 is Colonial glass. Wavy, bubbly, and warped.
Kind of like me.
Windows made in the 1700s have been sanded and painted many times, and only a restoration tech knows the history of that window, and that only after that tech puts it to rights.
For instance, in the picture above, it is obvious that someone (many someones) in the past sanded the thin putty rail so heavily that it has curved downwards in the middle. This makes it really hard to apply putty in a straight line.
The curves in the stiles don't help, either.
A really good view of the oversanded putty rails. And that what awaits them.
Jump ahead to after putty work is done.
You'll have to wait until next time for a lesson in puttying, and trust me, it took me decades to get it right.
BUT.
I deserve a reward.
This is simply the best Pinot Noir I've ever had. Mix it with small chunks of good English Stilton, and the travails of the window shop melt away.
Nothing like Willamette Valley.
Pronounced wil-Amett, you cretins.
After installation (and having made it operable for the first time in decades), the window on the right is the finished product, the left, the (hopefully) next to restore. Right looked like left when this thing started.
Before
After.
Actually the twin window to the south. But you get the picture.
And I'm still not satisfied with it.
The sill was scraped, primed, and the casement is set up for restoration when the weather warms. This was all done in early February in New England. Warmest winter ever.
Yet to be restored
Oh, yeah.
Dat's da ticket.
Looking out to my ancient 1985 van, the overly-sanded muntin tops show their age. and how smooth they have become.
Ready to face another hundred years.
As long as they are maintained.
A final shot of my favorite knot.
Even with a primer coat and two topcoats, it still shows the intent of an ancient craftsman.
Like me.